
A practical field checklist for builders, roofers and heritage contractors ordering cast iron gutters, downpipes and hopper heads for a listed or period building. It covers how to identify the profile, what to measure, what to count on each elevation, what to photograph, what to bring for copy casting, and when to stop measuring and book a survey.
Technical Summary
Before ordering cast iron rainwater goods, record five things for every elevation: the gutter profile and nominal size (measured across the top and by depth, and photographed with a tape in shot), the pipe diameter and shape, the running length of each gutter and pipe, every fitting in the run (angles, outlets, stop ends, unions, offsets, hopper heads, shoes, branches and access pipes), and the bracket type with the substrate it fixes into. Cast iron is supplied in nominal sizes and profiles vary between patterns, so a photograph with a tape across the profile is worth more than any written description. Where the building has curved gutters, ornate hoppers, awkward offsets or several elevations, a chargeable site survey is the safer route. Lead times run from 5 to 7 working days for stock items to 12 to 14 weeks for bespoke castings, so measure early.
Contents
Most problems with cast iron rainwater orders begin on site, not in the pattern shop. A gutter ordered as four-and-a-half-inch ogee turns out to be a 125 mm moulded section; a run counted from a drawing is two lengths short once the return around a bay is included; the downpipes arrive plain when the originals were eared. To order cast iron rainwater goods correctly you need to identify the gutter profile and nominal size, the pipe diameter and shape, the running length of each run, every fitting and bracket in it, and the offsets, hopper heads and outlets that connect them, recorded elevation by elevation and backed up with photographs. This checklist sets out how to do that in a morning, what to photograph, what to bring us for copy casting, and when to stop measuring and book a survey instead.
It is written for the builder, roofer or heritage contractor who has been asked to price and deliver a like-for-like replacement on a listed or period building, and it will be equally useful to a surveyor preparing a schedule or an owner gathering information before a first enquiry. It deliberately does not repeat the detailed methods that already have their own guides on this site. Where a subject needs more depth, such as measuring the radius of a curved gutter or calculating pipe offsets and swan neck sizes, we link to it rather than summarise it badly.
Cast iron cannot be adjusted on site in the way that sheet materials can. A length can be cut, but it cannot be bent, stretched or eased, and a fitting of the wrong pattern will not seal against the next length however carefully it is bedded. Everything therefore has to be right when it leaves us, which means everything has to be right when it is recorded on site.
Three characteristics of cast iron gutters and pipes drive the whole checklist. First, they are sold in nominal sizes. A 115 mm half round is a designation, not a promise that any face of the casting measures exactly 115 mm, and two foundries’ patterns of the same nominal size can differ by several millimetres in width, depth and lip. Second, the joints are the system. Socketed lengths, union clips, outlets, angles and stop ends only work when the profile matches the pattern the fittings were made for, so the fittings cannot be chosen until the pattern is identified. Third, everything hangs on the fixings, and the fixings depend on the building: a bracket that suits a timber fascia is useless on a corbelled stone eaves.
On a listed building there is a further reason. Like-for-like replacement is the basis on which most gutter work proceeds without a full application for Listed Building Consent, and the conservation officer will expect the new goods to match the old in profile, size, jointing and fixing. A measure-up record with photographs is the evidence that they do. Goods we supply are manufactured to BS 460:2002, and the record you make on site is what lets us specify the correct profile within that standard.
The gutter profile is the first thing to establish, because it decides which family of fittings the whole system will use. Identify it from the ground first, confirm it up close with a tape, and photograph both.
Stand back far enough to see the front face of the gutter in section against the sky, ideally at a corner where the angle shows the shape end-on. A plain semicircle with no lip is a half round. A semicircle with a rolled bead along the front edge is a beaded half round. A section that looks semicircular but is clearly deeper than half its width is a deep half round. A flat back against the fascia with an S-curved front face, a curved lip at the top and a concave sweep below, is an ogee, often called OG. A front face with steps, fillets or a moulded band rather than a single curve is a moulded profile. A rectangular section with vertical faces is a box gutter. Our guide to cast iron gutter profiles illustrates each of these on the buildings they belong to.
Look at every elevation separately. Rear elevations, returns and later extensions frequently carry a different profile, or a different pattern of the same profile, from the front.
At eaves level, hold a tape across the top of the gutter from outer face to outer face and read the width. Then measure the inside width between the top edges, and the internal depth from the top edge down to the lowest point inside the gutter. On an ogee, add the height of the front face from the lip to the bottom edge, and the height of the back. On a moulded or box section, measure the overall width and depth of the section and the width of the flat bottom.
The nominal size refers to the width of the opening at the top, so an outside reading of 118 mm and an inside reading of around 108 mm both point to a 115 mm gutter. Write down which reading you took. The depth is what separates a deep half round from a standard half round of the same nominal width, and it is the measurement most often left off a site note.
| Profile | How to recognise it | Nominal sizes commonly made | What to measure |
|---|---|---|---|
| Half round | Plain semicircle, no lip | 100, 115, 125, 150 mm | Width across the top; internal depth |
| Beaded half round | Semicircle with a rolled bead on the front edge | 100, 115, 125, 150 mm | Width across the top including the bead; depth; bead diameter |
| Deep half round | Semicircular but deeper than half its width | 100, 115, 125, 150 mm | Width across the top; internal depth (the tell) |
| Ogee (OG) | Flat back, S-curved front with a lip at the top | 100, 115, 125, 150 mm | Width across the top; front height; back height; internal depth |
| Victorian ogee variants (e.g. Notts, H16) | Ogee with a different lip, sweep or depth from the standard pattern | 115, 125 mm typically | As ogee, plus a straight-on photo of the lip |
| Moulded (e.g. G46) | Stepped or moulded front face | Quoted width x depth, e.g. 125 x 100 mm (5 x 4 in) | Overall width and depth; width of flat bottom |
| Box | Rectangular section, vertical faces | 100 to 150 mm and bespoke | Width, depth, wall and any lip |
| Large sand cast | Deep moulded sections on civic and church buildings | Bespoke, quoted width x depth | Full section drawing or template |
Not every profile is made in every size, and some patterns are only made to order; we confirm availability against your photograph when we quote. For how nominal width relates to capacity, see Cast Iron Gutter Sizes Explained.
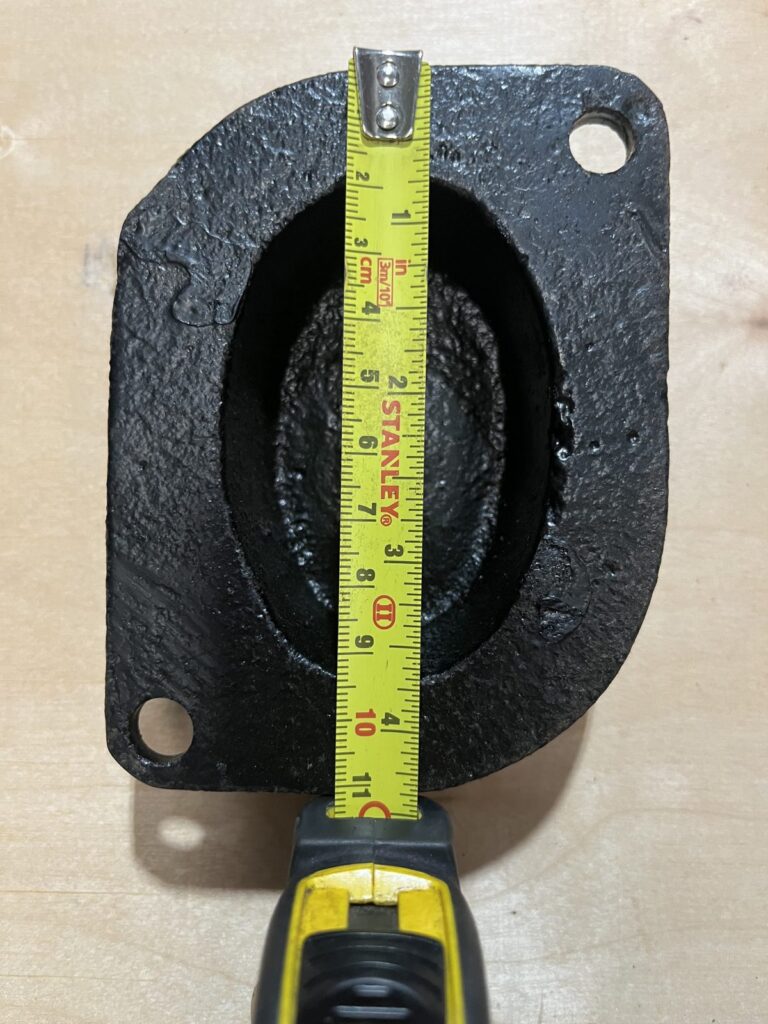
Because sizes are nominal and patterns vary, a photograph of the tape held across the profile tells us more than the figure on its own. It lets us match the gutter to a pattern in current production, or recognise that it is an older pattern that will need copy casting. Take the photograph square on to the end of the gutter, with the tape flat across the top and the numbers legible, and take a second one along the front face to show the lip and any bead or moulding. If the gutter is painted thickly, note it: paint build-up of several coats can add a millimetre or two to every reading.
Downpipes are simpler to identify than gutters but easier to order wrongly, because the pipe, the outlet above it and the hopper or shoe at each end all have to share a size. Measure the pipe, then check that every connection agrees with it.
Round cast iron rainwater pipes are made in 63 mm (2.5 in), 75 mm (3 in) and 100 mm (4 in) nominal diameters, with larger sizes to order for big roofs. Rectangular pipes are made in 100 x 75 mm (4 x 3 in), and square pipes in 75 x 75 mm and 100 x 100 mm. Measure the outside of the barrel, not the socket, and remember that the nominal size describes the bore, so a 75 mm pipe reads larger than 75 mm on the outside. Our guide to cast iron pipe sizes sets out how each size relates to roof area and outlet size.
An eared pipe has two lugs cast onto the socket, through which it is nailed or screwed to the wall, usually with distance pieces behind the ears to hold the barrel clear of the face. A plain, or uneared, pipe has no lugs and is held by separate holderbats or pipe brackets. The two are made in the same diameters and look alike from the ground, so check the socket. Record which the building has, because it decides both the fixings and the projection of the offsets above.
Some stacks on older buildings are not rainwater pipes at all. A soil or vent stack usually has a cowl or open vent at the top, branches from bathrooms and kitchens, and a heavier wall with deeper sockets designed for caulked joints. It is replaced with socketed LCC soil pipe, not rainwater pipe. Rainwater pipe has a lighter wall and a shallower socket that is jointed dry. If a rainwater pipe also receives waste from a hopper, or discharges into a combined drain below ground, say so: the jointing at the foot changes.
| Pipe | Sizes | Fixing | Typical use |
|---|---|---|---|
| Round rainwater pipe, eared | 63, 75, 100 mm | Nails or screws through the ears with distance pieces | Domestic and commercial rainwater, most Victorian and Edwardian stock |
| Round rainwater pipe, plain | 63, 75, 100 mm | Holderbats or pipe brackets | Where a stand-off or a particular bracket pattern is required |
| Rectangular and square pipe | 100 x 75 mm; 75 x 75 mm; 100 x 100 mm | Eared or plain, with matching brackets | Georgian and Regency fronts, civic and institutional buildings |
| LCC soil pipe, socketed | 75, 100 mm and larger | Holderbats; caulked or sealed joints | Soil and vent stacks; rainwater stacks carrying foul water |
Work around the building one elevation at a time and record each gutter run as a line on a sketch, with its fittings marked in order from one end to the other. The aim is a schedule we can price as a single order.
Measure each straight run from corner to corner, or from stop end to angle, in metres to the nearest 10 mm. A laser measure from the ground is accurate enough for the run itself; the fittings still need to be read at eaves level. Gutters are supplied in 1.83 m (6 ft) standard lengths, with shorter lengths available for some profiles. Each socket joint takes up part of the length, so the number of lengths is the run divided by the effective length, rounded up, with a cut length at one end. We do that arithmetic when we quote, which is why we ask for the run rather than a count.
Traditional practice lays cast iron to a shallow fall towards the outlet of a few millimetres per metre, but many historic runs are level and rely on the position of the outlet. Note whether the existing run is level or laid to fall, and where the outlets sit along it. This matters most where rise-and-fall brackets are used, because the fall is set in the brackets rather than in the gutter.
Depending on the profile, lengths are either socketed, with a socket at one end and a spigot at the other, or plain-ended and joined with union clips. Note which the building uses. On socketed gutters, record the hand of the socket: stand facing the wall and note whether the socket is on the left or right of each length, because outlets, angles and stop ends are all supplied handed to suit. Count the unions separately, as they are also needed wherever a cut length meets a full one.
Angles are internal (an inside corner) or external (an outside corner), and are made at 90 degrees for square corners and 135 degrees for bays and splayed corners, with other angles to order. Count each by type and hand. Outlets are either running outlets, which sit within the run with a spigot below for the pipe, or stop end outlets, which close the run and take the pipe at the end. For each, record the pipe size and section it drops into. Stop ends are internal, fitted inside the gutter end, or external, fitted over the end, and are left or right handed when viewed facing the wall.
Record the bracket type on each elevation and the substrate it fixes into, because the two go together. Fascia brackets screw to a timber fascia board. Side-fix rafter brackets screw to the side of the rafter foot where there is no fascia, and top rafter brackets go over the rafter beneath the first course of slates or tiles. Rise-and-fall brackets carry the gutter on a threaded rod from a drive-in spike or a built-in plate in the masonry, and are the answer on stone and brick eaves with a corbel course and no timber to fix to. Drive-in brackets spike directly into a mortar joint. Ogee and moulded gutters are often screwed straight through the flat back into the fascia with no bracket at all; if so, record the screw positions instead. Allow one bracket at each joint and one at mid-length, around 915 mm (3 ft) centres, closer on heavy sections. Note the condition of the fascia or the joints, since a rotten fascia or a raked-out joint will change the fixing you can use. Our page on gutter and pipe brackets shows the main patterns.
| Gutter component | Record | Count by |
|---|---|---|
| Straight lengths | Run length per elevation; joint type; socket hand | Metres of run, not lengths |
| Angles | Internal or external; 90 or 135 degrees; hand | Each |
| Running outlets | Position in run; pipe size and section below | Each |
| Stop end outlets | Hand; pipe size below | Each |
| Stop ends | Internal or external; left or right hand | Each |
| Union clips | Joints between spigot ends, including at cut lengths | Each |
| Brackets | Type; centres; fixing substrate and condition | Each, or per length |
| Direct fixings | Screw positions through the gutter back (ogee and moulded) | Per length |
Treat each downpipe as its own line on the schedule, from the outlet or hopper at the top to the shoe or gully at the bottom, with every fitting listed in order. Downpipe orders go wrong at the connections, so the record should show what each fitting connects to.
Count the pipes on each elevation and measure the drop of each from the underside of the gutter outlet, or the outlet of the hopper, to the top of the shoe or the gully. The pipe itself comes in 1.83 m lengths, so the drop less the fittings gives the number of lengths, with one cut length. Note where a pipe passes a string course, plinth, cornice or window head, because each is a possible offset.
For plain pipes, record the holderbat or bracket pattern and how it fixes: a built-in stem bedded into a joint, or a backplate screwed to the wall. For eared pipes, record the ear fixing and the distance pieces behind the ears. In both cases measure the stand-off between the wall face and the back of the pipe, because the offset at the top has to deliver the pipe to that line and the pipe has to sit clear of the wall so that its back can be painted. Record the substrate (brick, stone, render, timber) and the bracket spacing, which is normally one at each socket and one between. Our guide on fixing cast iron rainwater pipes covers the sequence once the goods are on site.
Wherever the gutter outlet sits proud of the wall, the pipe needs an offset, or swan neck, to bring it back to the wall line. Measure two things and sketch them: the projection, which is the horizontal distance between the centreline of the outlet and the centreline of the pipe at the wall, and the drop, which is the vertical distance from the underside of the outlet to where the vertical pipe begins. Look for a second offset lower down where the pipe steps over a plinth or string course, and measure that in the same way. Standard one-piece offsets come in fixed projections; anything larger, or anything that changes plane, is made up from bends and a short straight. The method, the standard projections and the bend angles are set out in Calculating Pipe Offsets and Swan Neck Sizes, so we do not repeat them here. A dimensioned sketch is worth more than a description.
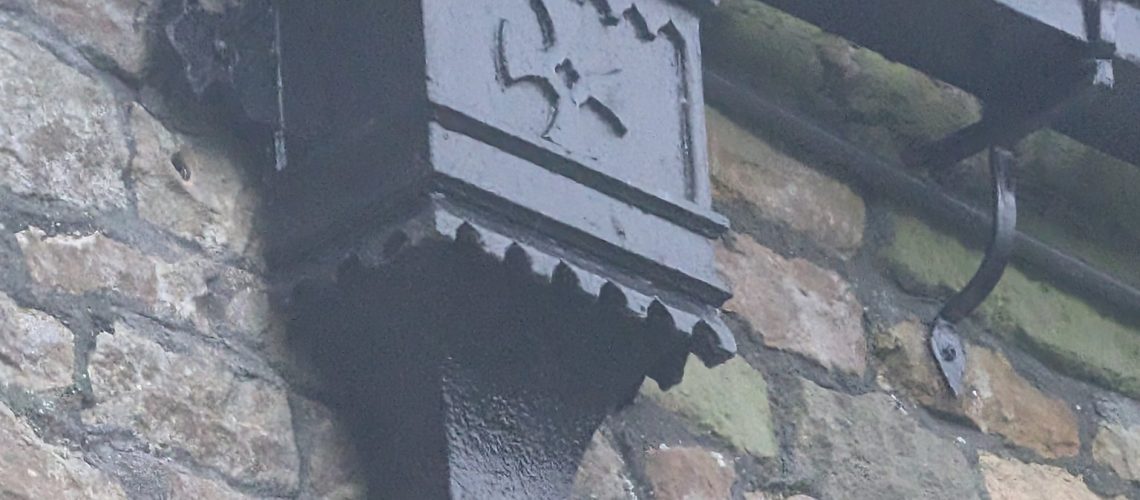
For each hopper head, measure the front width, the depth from front to back, and the overall height. Record the outlet size (63, 75 or 100 mm) and where it sits (centre or towards the back), and how pipes enter: an open top only, or pipes entering from the side or the back. Note whether the hopper is flat-backed for fixing to the wall, where the fixing holes are, and any ornament, date, initials or armorial you need reproduced. Photograph it straight on and from the side. A hopper that receives two pipes needs both inlet positions recorded.
At the foot of each pipe record whether there is a shoe discharging over a gully, a bend into a drain, or a straight connection into a back-inlet gully. Record any bends around projections with their angle, any branch where a second pipe joins, with both diameters and the angle, and any access pipe with a door for rodding. These small fittings are the ones most often missed from a schedule.
| Downpipe component | Record | Count by |
|---|---|---|
| Pipe | Diameter or section; eared or plain; rainwater or LCC; drop per pipe | Metres of drop, not lengths |
| Pipe brackets, holderbats, ears | Pattern; fixing method; stand-off from wall; substrate; spacing | Each, or per length |
| Offsets and swan necks | Projection and drop of each, sketched; plane changes | Each |
| Hopper heads | Front width, depth, height; outlet size and position; inlets; flat back; ornament | Each |
| Shoes | Type; over gully or into drain | Each |
| Bends | Angle; position | Each |
| Branches | Both diameters; angle | Each |
| Access pipes | Position; door type | Each |
Photographs let us check the rest of the record, so take more than you think you need and name the files by elevation. The list below is the minimum for an order; for copy casting, see the next section.
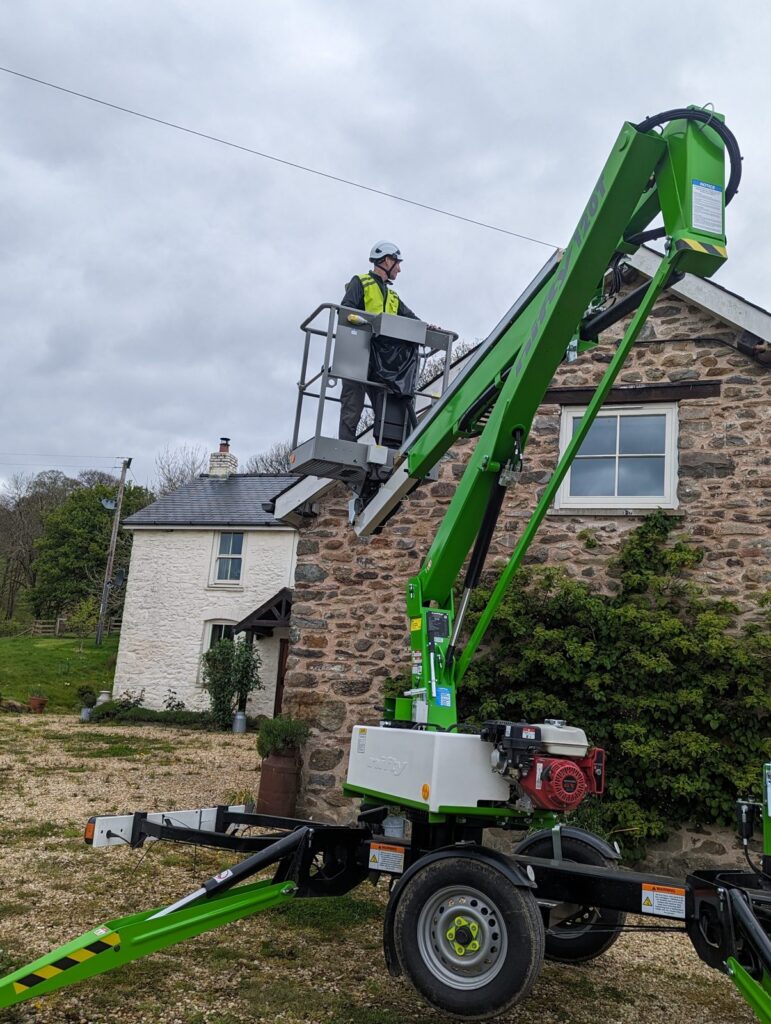
The measure-up is also the moment to settle how the goods will get onto the building and when. Record how you took the measurements, what access the installation will have, and when the scaffold is booked, then set the order date back from that by the lead time.
Cast iron is delivered on a pallet in 1.83 m lengths, so note the delivery address, whether a lorry with a tail-lift can reach it, and where the goods will be stored until they go up. Components arrive interleaved with wax paper from our workshop; keep it in place until fixing and do not wrap the goods in impermeable sheeting, which traps condensation against the finish.
| Item | Typical lead time |
|---|---|
| Stock items | 5 to 7 working days from order |
| Non-stock standard profiles | 7 to 10 working days from order |
| Bespoke and copy cast items | 12 to 14 weeks from pattern approval |
| Radius gutters | 12 to 14 weeks |
| Linseed oil finish (any item) | Adds 6 to 7 weeks for the finish applied in our workshop |
| Standard quotation | Within 3 working days of a complete schedule |
| Bespoke quotation | Longer, where pattern costing is needed; we say so at the outset |
If the programme cannot absorb a bespoke lead time, tell us at enquiry. It is sometimes possible to supply the stock elements of a system first so that the straightforward elevations proceed while a copy cast hopper or a radius section follows. Deciding the finish early matters for the same reason: a linseed oil finish applied in our workshop adds 6 to 7 weeks, and it is applied before delivery, not on site.
Where the profile or a hopper is not in current production, we copy cast it to order. The quality of the reference material decides the cost and the lead time, so gather it during the measure-up rather than after the old goods have gone in the skip.
Pattern-making is the main cost in copy casting and is a one-off; patterns are retained, so later reorders for the same building do not carry it again. Bespoke and copy cast items take 12 to 14 weeks from pattern approval, and the quotation for bespoke pattern work takes longer than a standard one because the pattern has to be costed first. Read our guide to safe removal of cast iron gutters before taking anything down, so that reference sections survive intact.
A contractor with a tape, a camera and this checklist can record most straightforward buildings accurately. Some buildings should not be measured that way, and on those we recommend our site survey visit before anything is specified.
The survey is chargeable, with a proportion of the fee credited against a subsequent supply order. It produces a measured schedule of every component on every elevation, photographs, and a specification report that can go to the conservation officer and be priced as a single order. Where the client already has drawings, our drawing take-off service can produce a schedule from them, with a site visit reserved for the elements a drawing cannot show. Our article on the value of on-site surveys explains what a survey finds that desktop specification misses.
The same errors account for most of the corrections we make to schedules before they become orders.
The examples below are representative of the situations a measure-up has to deal with on period and listed buildings. They show what the record needed to capture rather than describing particular projects.
Victorian terrace, West Yorkshire (Grade II)
A contractor replacing the front gutters on a stone terrace sent photographs with a tape held across the profile. The front elevation carried a 125 mm ogee with a pronounced lip; the rear, added later, carried a plainer 115 mm ogee of a different pattern. Ordering both as ‘ogee’ from the drawing would have produced two runs that did not join at the return. Both patterns were matched before the order was placed, and the schedule went to the conservation officer as a photographed, like-for-like record of what was there.
Georgian rectory, Somerset (Grade II*)
Deep eaves and a moulded cornice put the gutter outlets around 380 mm proud of the wall face. The roofer measured the projection and drop at each of eight outlets and sketched them on the elevation schedule, noting two positions where a string course needed a second offset lower down. Every swan neck was made up from bends and short straights to the sketched dimensions, and no pipe had to be cut or re-set once the scaffold was up.
Nonconformist chapel, Powys (Cadw listed)
A rubble-stone chapel with no fascia board and a corbelled eaves course. The builder recorded the mortar joint positions along each eaves and the fall of the existing run, which allowed rise-and-fall brackets with drive-in spikes to be scheduled at the right centres instead of fascia brackets that had nothing to fix into. The gable hopper was measured front, side and outlet, and a flat-backed pattern of the same proportions was selected from the standard range.
Tenement block, Glasgow (Category B)
The factor’s specification called for replacement rhones and rhone hooks in 150 mm deep half round with 75 mm eared pipes. The measure-up identified that one rear stack carried a vent cowl and a branch from the bathrooms: it was a socketed LCC soil stack, not a rainwater pipe, and needed heavier-wall pipe with caulked joints. Recording that distinction on site avoided an order for rainwater pipe that could not have been jointed correctly.
Manor house with a curved bay, Gloucestershire (Grade II)
A two-storey bay with a curved lead roof and a beaded half round gutter following the curve. A chord-and-rise measurement taken from a ladder produced a radius that differed by more than 200 mm from a template taken later at eaves level. Radius sections were made to the template, the 12 to 14 week lead time was written into the roofing programme, and the scaffold stayed up for one hire period rather than two.
Print one copy per elevation. Every line should have an entry, even if the entry is ‘none’.
| Item | What to record | Done |
|---|---|---|
| Building and elevation | Address, listed status, which elevation (front, rear, left return, right return, outbuildings) | [ ] |
| Gutter profile | Half round, beaded, deep half round, ogee, moulded, box; note any second pattern on other elevations | [ ] |
| Gutter size | Width across the top (outside and inside) and internal depth; photo with tape in shot | [ ] |
| Joint type | Socketed lengths or plain lengths joined with union clips; socket hand (left or right, facing the wall) | [ ] |
| Run lengths | Measured length of each straight run in metres, corner to corner | [ ] |
| Fall and outlet position | Level or laid to fall; where each outlet sits along the run | [ ] |
| Angles | Internal or external; 90 degrees, 135 degrees or other; count per elevation | [ ] |
| Outlets | Running outlets and stop end outlets; pipe size each connects to; round or rectangular | [ ] |
| Stop ends | Internal or external; left or right hand; count | [ ] |
| Unions | Number of joints where two spigot ends meet | [ ] |
| Gutter brackets | Fascia, side-fix rafter, top rafter, rise-and-fall, drive-in; spacing; fixing substrate and its condition | [ ] |
| Downpipes | Number of pipes; diameter (63, 75, 100 mm) or section (100 x 75 mm); eared or plain; rainwater or LCC soil pipe | [ ] |
| Pipe length | Drop from outlet or hopper to shoe or gully for each pipe | [ ] |
| Pipe brackets | Holderbats, earbands or ear fixings with distance pieces; stand-off from wall; substrate; spacing | [ ] |
| Offsets and swan necks | Projection and drop for each, sketched with dimensions; any second offset at plinths or string courses | [ ] |
| Hopper heads | Front width, depth, height; outlet size and position; inlet arrangement; flat back; ornament or date | [ ] |
| Shoes, bends and branches | Shoe at each foot; bend angles; branches with both diameters; access pipes | [ ] |
| Damaged and missing items | Which components are cracked, missing or non-original; which survive as reference | [ ] |
| Cast marks | Maker’s names, numbers or size marks cast into gutters, pipes and hoppers | [ ] |
| Photographs | Whole elevation; profile with tape; sockets and brackets; offsets from the side; hoppers front and side; damage; pipe foot | [ ] |
| Access and scaffold | How the measure-up was done; what access the installation will have; scaffold dates | [ ] |
| Finish | Primer, factory black, or linseed oil finish in a chosen colour | [ ] |
| Programme | Date goods are needed on site; consent position; delivery address and access for a pallet | [ ] |
Send us the following and a standard quotation will follow within 3 working days. Bespoke items are costed separately once the pattern work is confirmed, and we tell you at the outset if that applies.
Our guide to cast iron guttering quotes and estimates explains how the quotation is built up once the schedule arrives, and the product catalogue lists the standard profiles and fittings by name and code so that your schedule and our quotation use the same language.
The questions below are the ones we are asked most often when a schedule arrives. Each answer stands on its own.
| Question | Answer |
|---|---|
| How do I measure cast iron guttering to find out what size it is? | Measure across the top of the gutter from outer face to outer face, then measure the internal depth from the top edge to the lowest point inside. Cast iron gutters are sold in nominal sizes of 100, 115, 125 and 150 mm, and the nominal figure refers to the width of the opening at the top, so a reading of 118 mm across the outside usually means a 115 mm gutter. Photograph the tape in position so the profile can be matched to a pattern as well as a number. |
| How can I tell whether my gutter is ogee or half round from the ground? | Look at the front face. A half round gutter is a plain semicircle and looks the same at any point; a beaded half round has a rolled bead along the front edge; an ogee has a flat back and an S-shaped front with a curved lip at the top. Deep half round looks semicircular but is noticeably deeper than half its width. If two elevations look different, treat them as different patterns until a close-up photograph proves otherwise. |
| What size are cast iron gutters, and does a 115 mm gutter really measure 115 mm? | The standard nominal sizes are 100 mm (4 in), 115 mm (4.5 in), 125 mm (5 in) and 150 mm (6 in), with larger sand cast and moulded sections quoted by width and depth. A nominal size is a designation rather than an exact dimension: patterns from different foundries and periods vary by a few millimetres, and the outside width is greater than the inside width by the wall thickness on each side. State which you measured and send a photograph. |
| How long is a standard length of cast iron gutter or downpipe? | Gutters and downpipes are supplied in 1.83 m (6 ft) standard lengths, with shorter lengths available for some profiles. The socket at each joint takes up part of the length, so divide the run by the effective length rather than the nominal length and round up. We check the count when we quote, which is why we ask for the measured run length rather than a number of lengths. |
| How many gutter brackets do I need per length of cast iron gutter? | Allow one bracket at each joint and one at mid-length, which gives centres of roughly 915 mm (3 ft), plus a bracket close to each angle, outlet and stop end. Heavy moulded and 150 mm sections, and buildings in areas prone to snow loading, are supported at closer centres. Ogee gutters are often screwed directly through the flat back into the fascia, in which case record the screw positions rather than brackets. |
| What is the difference between eared and uneared cast iron downpipes? | An eared pipe has two lugs cast onto the socket that are nailed or screwed directly to the wall, usually with distance pieces behind the ears to hold the pipe clear of the face. An uneared, or plain, pipe has no lugs and is held by separate holderbats or pipe brackets. Both are made in the same diameters, but the fixings, the stand-off from the wall and the appearance differ, so record which the building has before you order. |
| How do I measure a swan neck or offset for a cast iron downpipe? | Measure the projection, which is the horizontal distance between the centreline of the gutter outlet and the centreline of the downpipe where it sits against the wall, and the drop, which is the vertical distance from the underside of the outlet to the point where the vertical pipe begins. Sketch both on the elevation record. Standard one-piece offsets are made in fixed projections; larger or unusual offsets are made up from bends and a short straight, which we set out for you from the sketch. |
| What information do you need to quote for a cast iron hopper head? | The front width, the depth from front to back, the overall height, the outlet diameter (63, 75 or 100 mm) and where the outlet sits (centre or towards the back), and whether pipes enter the top from above, the side or the back. Add a straight-on photograph and a side photograph, note whether the hopper is flat-backed for wall fixing, and tell us about any ornament, date or monogram you want reproduced. |
| Is my old pipe a soil pipe or a rainwater pipe, and does it matter when I reorder? | It matters. A soil or vent stack usually has a cowl or open vent at the top, branches from bathrooms and a heavier wall with deeper sockets for caulked joints, and is replaced with socketed LCC soil pipe. A rainwater pipe runs from a gutter outlet or hopper to a shoe or gully, has a lighter wall and shallower sockets, and is jointed dry. Ordering rainwater pipe for a soil stack produces a pipe that cannot be jointed correctly. |
| Do I need Listed Building Consent to replace cast iron gutters like for like? | Genuine like-for-like repair or replacement of cast iron with cast iron of the same profile, size and finish is often treated as maintenance, but the decision rests with the local planning authority and depends on the extent of the work and the building’s listing. A change of profile, size, material or fixing method almost always needs consent. Confirm the position with the conservation officer before ordering, and keep the measure-up record as evidence of what was there. |
| Can I send you a broken piece of gutter or pipe to copy? | Yes. A fragment is the best reference for copy casting provided one complete cross-section of the profile survives, together with a socket if the joint is unusual. Pack it so the edges are protected, and send photographs against a scale rule as well. If no fragment can be removed, a measured drawing of the full section and straight-on photographs with a tape in shot are the next best option. |
| When should I book a site survey instead of measuring the gutters myself? | Book a survey where the gutters are curved, where hopper heads are ornate or unusual, where offsets change plane around cornices and string courses, where the job covers several elevations or a large roof, where a listed building’s consent conditions require like-for-like documentation, or where safe access for measuring is not available. The survey is chargeable, with a proportion credited against a subsequent supply order, and produces a measured schedule that can be priced as a single order. |
| How long does it take to get cast iron rainwater goods once I have ordered? | Stock items are typically despatched in 5 to 7 working days and non-stock standard profiles in 7 to 10 working days. Bespoke and copy cast items take 12 to 14 weeks from pattern approval, radius gutters 12 to 14 weeks, and a linseed oil finish applied in our workshop adds 6 to 7 weeks. Standard quotations are returned within 3 working days; bespoke pattern costing takes longer and we say so at the outset. |
| What should I photograph before ordering cast iron gutters and downpipes? | Photograph each whole elevation from the ground, a close-up of the gutter profile with a tape held across the top, each socket and joint type, a bracket with its fixing visible, every offset from the side, each hopper head straight on and from the side, any damaged sections, the pipe foot and gully, and any cast marks, numbers or maker’s names. Name the files by elevation so they can be matched to the schedule. |
| Which way round is a left-hand or right-hand stop end on a cast iron gutter? | Stand on the ground facing the wall. A left-hand stop end closes the end of the run on your left, a right-hand stop end the end on your right. Record whether that end is a socket or a spigot, and whether the existing stop end is internal (fitted inside the gutter) or external (fitted over the end), because the fitting differs in each case. |
| Do I need to strip the old gutters before I measure for new cast iron ones? | No, and it is better not to. Measure and photograph the existing system in place, because the profile, the socket positions, the bracket centres and the offsets are all easier to read while the run is complete. Remove the old goods only once the replacement schedule has been agreed and the new goods are on order, and follow safe-removal practice so that surviving sections can be kept as reference for any copy casting. |
A cast iron rainwater order is only as good as the record it was built from. Identify the profile by photograph as well as by number, measure the pipe barrel rather than the socket, record every run in metres and every fitting by type and hand, note what each bracket fixes into, sketch every offset with its projection and drop, and measure each hopper head front, side and outlet. Photograph all of it, keep fragments and cast marks for copy casting, and set the order date back from the scaffold date by the lead time for the goods and the finish. Where the building has curves, ornate hoppers, complex offsets or many elevations, book a survey.
Tuscan Foundry Products has supplied cast iron rainwater goods for period and listed buildings since 1893. We supply standard and bespoke profiles to BS 460:2002, copy cast to order from fragments, drawings and photographs, apply linseed oil finishes in our own workshop, and survey buildings where a measure-up needs more than a tape. If you are part-way through a schedule and want a second pair of eyes on it before you order, send it to us or call 0333 987 4452.