
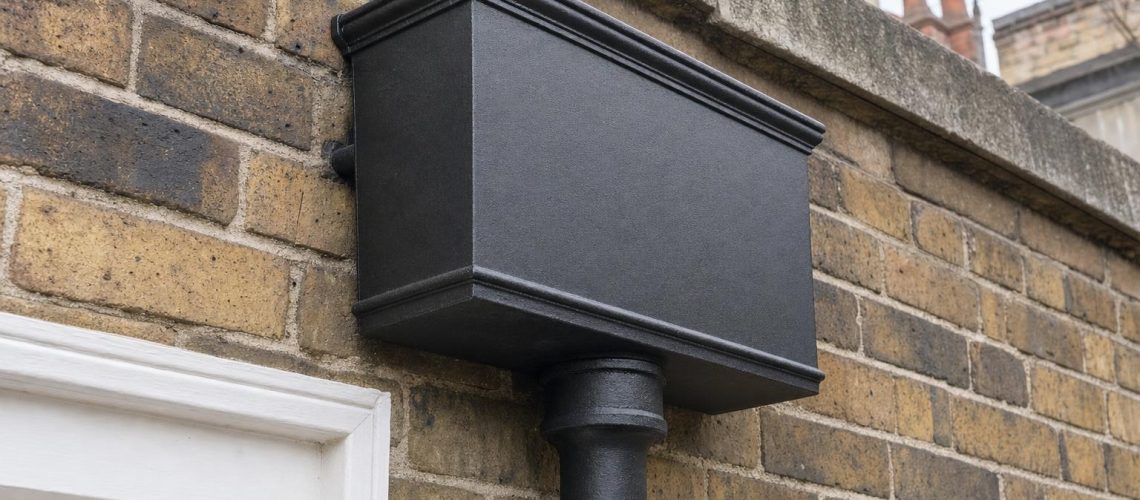
Georgian parapets, hidden box gutters and modern flat roofs all send their water out through the wall, often only a few courses below the coping. This guide explains the three ways of taking that water into a cast iron hopper head — the traditional lead chute, the shallow or side-outlet pattern, and the rear-inlet hopper — and how to choose, specify and maintain the right one.
Technical summary
Where water leaves a roof through a parapet wall, it is usually collected by a cast iron hopper head fixed below the outlet. The traditional detail is a lead chute discharging into the open top of the hopper, and it remains the first choice wherever there is enough height below the outlet. Where the outlet emerges too close to the coping for a hopper to sit beneath it — common on flat-roofed rear extensions, re-roofed Georgian parapets and modern through-wall outlets — the outlet pipe can instead be taken directly into a socket cast or fitted into the back of the hopper. A rear-inlet hopper must keep its top rim intact, keep at least 25 mm of solid metal around the opening, and be paired with a separate emergency overflow, because a blocked downpipe will back water up to the level of the hopper rim before it spills.
Contents
A great many period buildings do not drain over the eaves at all. When a roof is hidden behind a parapet, the water leaves through an outlet in the wall, and the cast iron hopper head below it must be detailed to suit that outlet — usually with a lead chute into an open-top head, and, where height is short, with a hopper that takes the pipe in through its back. Getting this junction wrong is one of the more common causes of saturated parapets, stained façades and water inside the building.
We have written this guide for conservation architects, surveyors, conservation officers and the contractors who carry out the work. It covers why the parapet detail exists, the three practical ways of collecting water from a through-wall outlet, how a rear-inlet hopper is made, the overflow risk that every parapet roof carries, and what we need from you to specify the right head first time. It sits alongside our wider guidance on cast iron rainwater heads and cast iron guttering.
Mistakes at this junction usually come from treating the hopper as an afterthought: a head chosen from a catalogue because it looks right, then found on site to sit too high, too low or too far from the outlet to work. The decision is better made the other way round — start with the outlet, its height below the coping and its size, and let that dictate the head.
Parapet roofs became the standard urban form in the eighteenth century, and the reasons were partly regulatory and partly architectural. After the Great Fire, London’s building legislation moved steadily against exposed timber at the eaves; the Building Act of 1707 outlawed the projecting wooden eaves cornice in the capital, and the masonry parapet that replaced it suited the classical taste for a clean cornice line and a roof kept out of sight. The pattern spread well beyond London, and Georgian and Regency terraces from Bath to Edinburgh’s New Town are built on the same principle.
Behind the parapet sits a gutter that the street never sees. On a double-pitched or M-shaped roof this is typically a lead-lined parapet gutter running behind the wall, sometimes with a central valley gutter draining front to back through the roof space. The gutter falls in steps (drips) to an outlet, where a small lead-lined sump — traditionally called a cesspool or cesspit — collects the water before it passes through the wall.
On the outside face the outlet emerges as a lead chute, a short cast or lead spout, or simply a pipe. The cast iron rainwater head below it does the rest: it receives the discharge, absorbs the splash, provides a visible overflow point, and feeds the downpipe. That is why so many Georgian hopper heads sit high on the elevation, often just beneath the cornice or blocking course, and why so many of them are among the most decorated pieces of ironwork on the building.
Modern work has added a second family of parapet roofs. Flat-roofed rear extensions, infill blocks and re-roofed historic parapets now commonly use membrane roofs drained through proprietary through-wall outlets, which leave the wall as a short horizontal spigot. These outlets are frequently set low in the parapet to suit the roof build-up, and that is where the conventional detail starts to struggle.
There are three practical ways of collecting water from a through-wall outlet: a chute discharging into an open-top hopper, a shallow or side-outlet hopper fitted into a narrow band, or a hopper that takes the outlet pipe directly through its back. The choice depends mainly on how much height there is between the outlet and the coping, and on the significance of the elevation.
| Detail | When it works best | Advantages | Limitations |
|---|---|---|---|
| Lead chute into open-top hopper | Outlet with enough height below it for the full head and a short drop | Traditional; easy to inspect; overflow is visible and harmless; no sealed joint | Needs height below the outlet; chute must be dressed and maintained |
| Shallow or side-outlet hopper | Narrow band between outlet and a string course, plinth or opening | Standard patterns; keeps the drop clean; minimal projection | Capacity limited by depth; still needs the outlet above the head |
| Rear-inlet hopper | Outlet too close to the coping for a head beneath it; modern through-wall spigots | Head can sit level with the outlet; outlet pipe concealed; neat appearance | Sealed joint; water backs up to rim level if the downpipe blocks; needs an emergency overflow |
The lead chute discharging into the open top of a cast iron head is the traditional detail, and wherever the height exists it remains our first recommendation. The chute is dressed through the wall from the cesspool, turned down at the outer face, and finishes inside the mouth of the head so that water falls cleanly into it. Nothing is sealed; the head can be lifted off its fixings, and a blocked downpipe announces itself by spilling over the front of the hopper rather than backing water into the roof.
For this to work, the top of the hopper has to sit below the chute, with the chute lip projecting over the open mouth. On most Georgian elevations that means the outlet is set two or three courses down from the coping, and the hopper sits beneath it. Conservation officers are generally familiar with this detail and will usually expect to see it retained or reinstated on a listed building.
Where the outlet is high enough for a head below it but the zone beneath is tight — a string course, a window head, a plinth or a boundary wall close underneath — a shallow pattern is often the answer. Our Stanton No.543 is a wide, shallow box with a side outlet, designed for exactly this kind of narrow band, and the Charton No.58 keeps projection to a minimum with an integral back plate. Both still rely on the outlet discharging into the open top, so they do not solve the problem of an outlet that is too high on the wall.
A rear-inlet hopper takes the outlet pipe straight into a socket in its back face, so the head can sit at the same level as the outlet rather than below it. This is the detail to consider when the outlet emerges within a course or two of the coping, when a through-wall spigot projects horizontally from the wall, or when the client wants the outlet pipe concealed behind the head. It is a made-to-order modification of a standard rectangular hopper rather than a stock item, and it brings one important trade-off — the overflow behaviour — which we cover in full below.
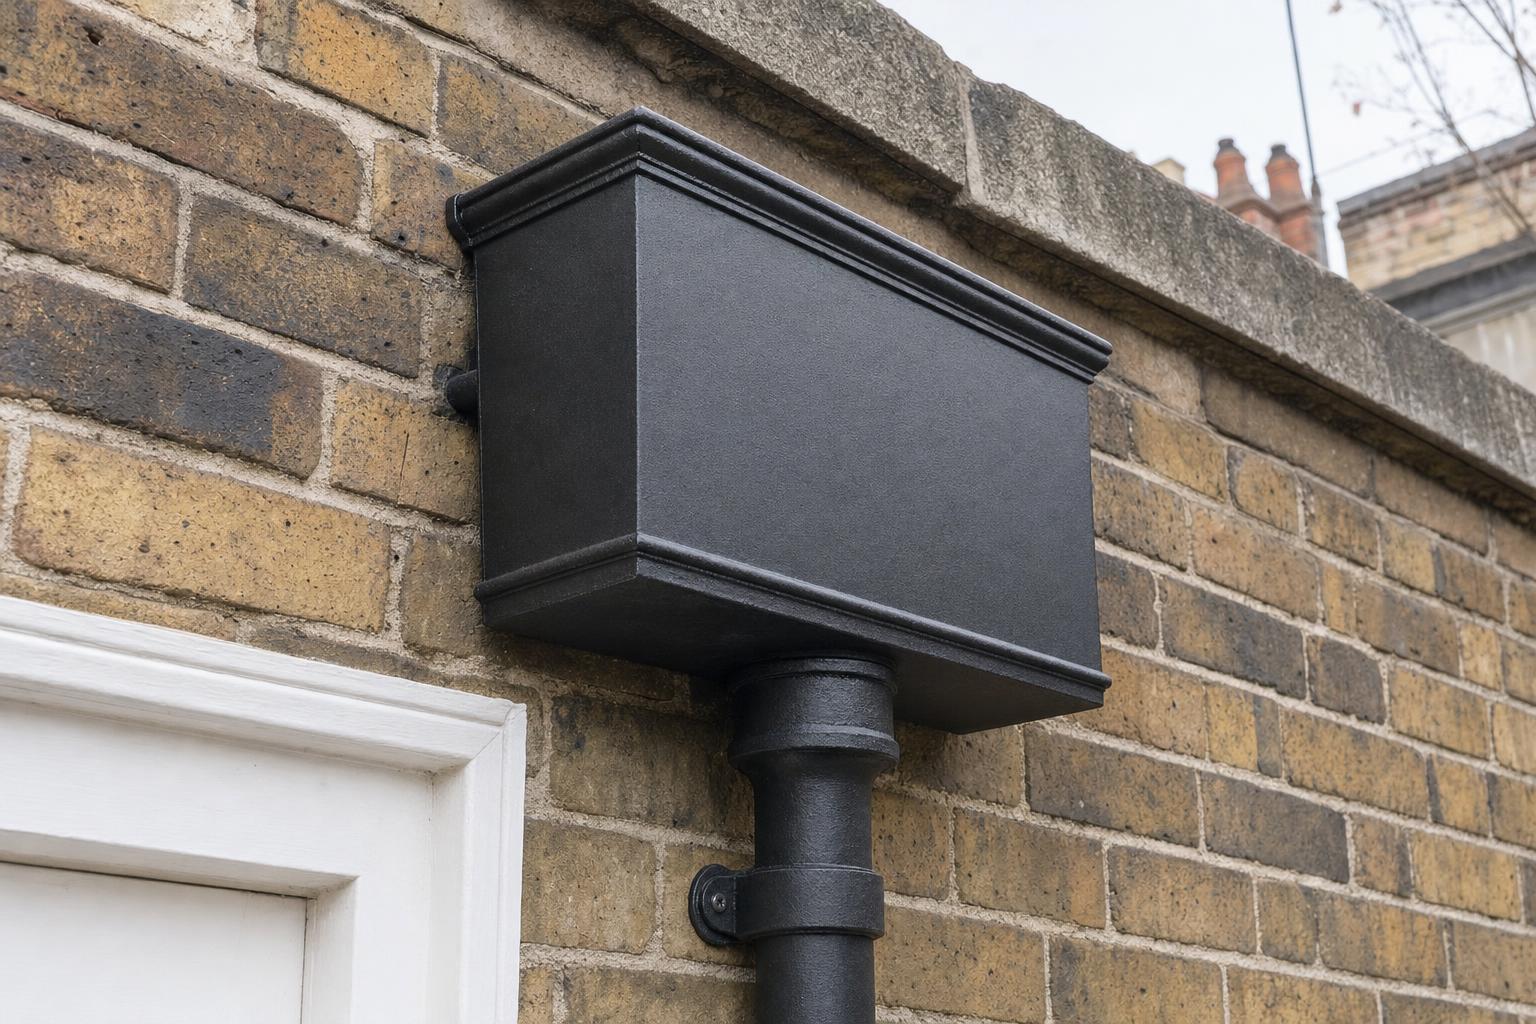
A rear-inlet hopper is a standard moulded rectangular head modified in the workshop to take a socket in its back face, set in the upper part of the hopper but well clear of the top rim. The opening is sized to the outlet pipe, surrounded by a boss of solid metal, and positioned from measurements taken on site.
Three rules govern the modification, and they are the same whether the socket is cast in or formed in the workshop:
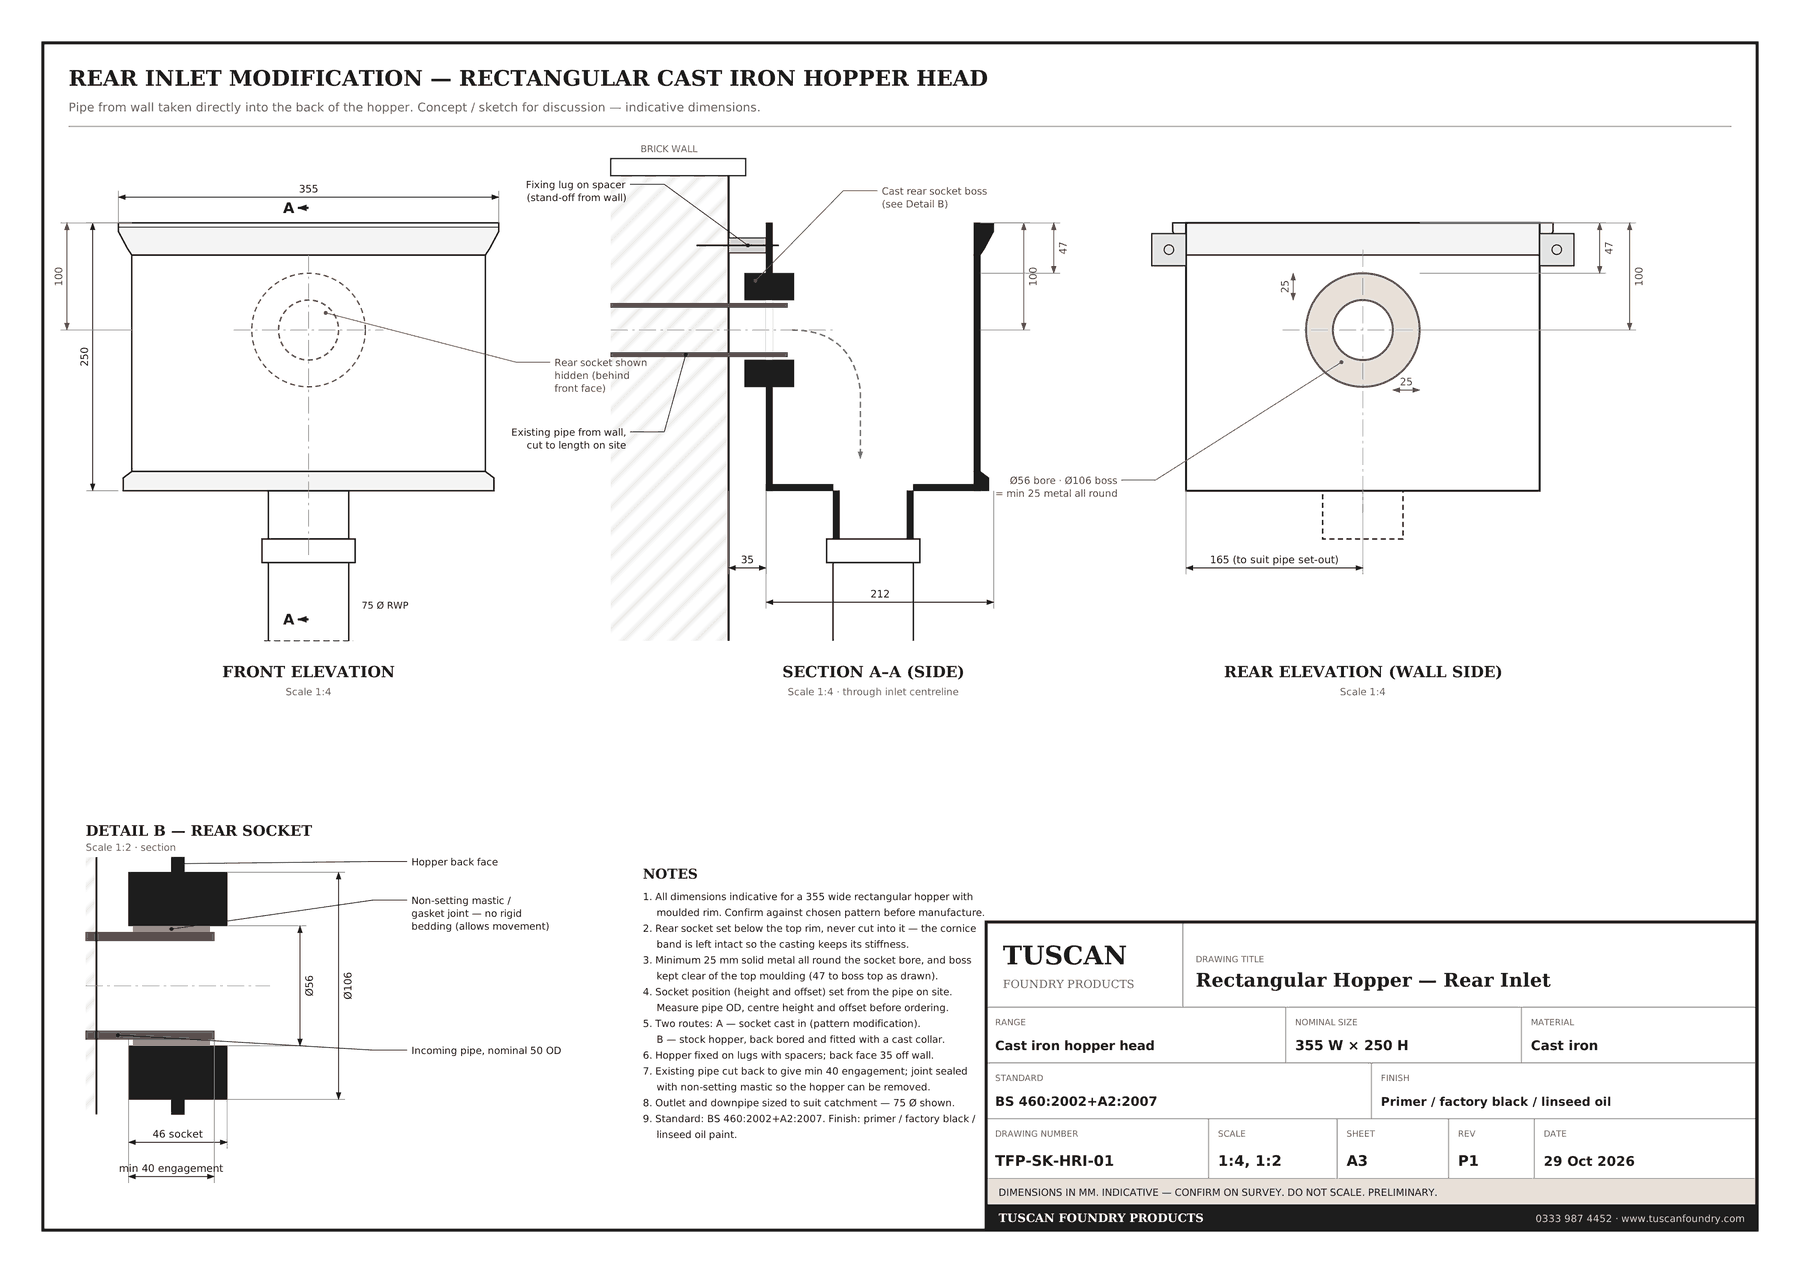
On the indicative arrangement shown in our drawing, a 355 mm wide moulded head takes a nominal 50 mm outlet pipe through a 56 mm socket with a 106 mm boss. The centreline sits 100 mm below the top of the head, leaving 47 mm of plain back face between the top of the boss and the rim, and the pipe enters the socket by at least 40 mm. The head stands about 35 mm off the wall on its fixing lugs and spacers, which gives room for the pipe and lets air circulate behind the casting.
The socket is sized to the outlet, but the downpipe is sized to the roof. The outlet and downpipe together must carry the design flow from the roof area behind the parapet, calculated in accordance with BS EN 12056-3. A rear inlet does not change that calculation; it simply changes how the water enters the head. Where a single outlet serves a large box gutter, we would expect the head and downpipe to be at least as large as the detail they replace.
The joint should be sealed with a non-setting mastic or a suitable gasket, not bedded rigidly in mortar or a hard-setting compound. A flexible joint accommodates the small thermal and structural movements between the wall and the cast iron, keeps water from tracking behind the head, and allows the hopper to be taken off its fixings for maintenance or repainting. Where the outlet spigot is copper or stainless steel rather than cast iron, the joint should also isolate the two metals to prevent galvanic corrosion of the cast iron.
Cutting or drilling an opening in the back of a hopper on site is a false economy. Cast iron is strong in compression but brittle under impact and point load, and an opening made with site tools risks hairline cracking that only shows itself after the first frost. It also breaks the protective coating where it matters most, inside the head where water sits. Forming the socket in the workshop lets us check the casting, keep the metal around the opening to the required thickness, and prime and finish the head as one piece.
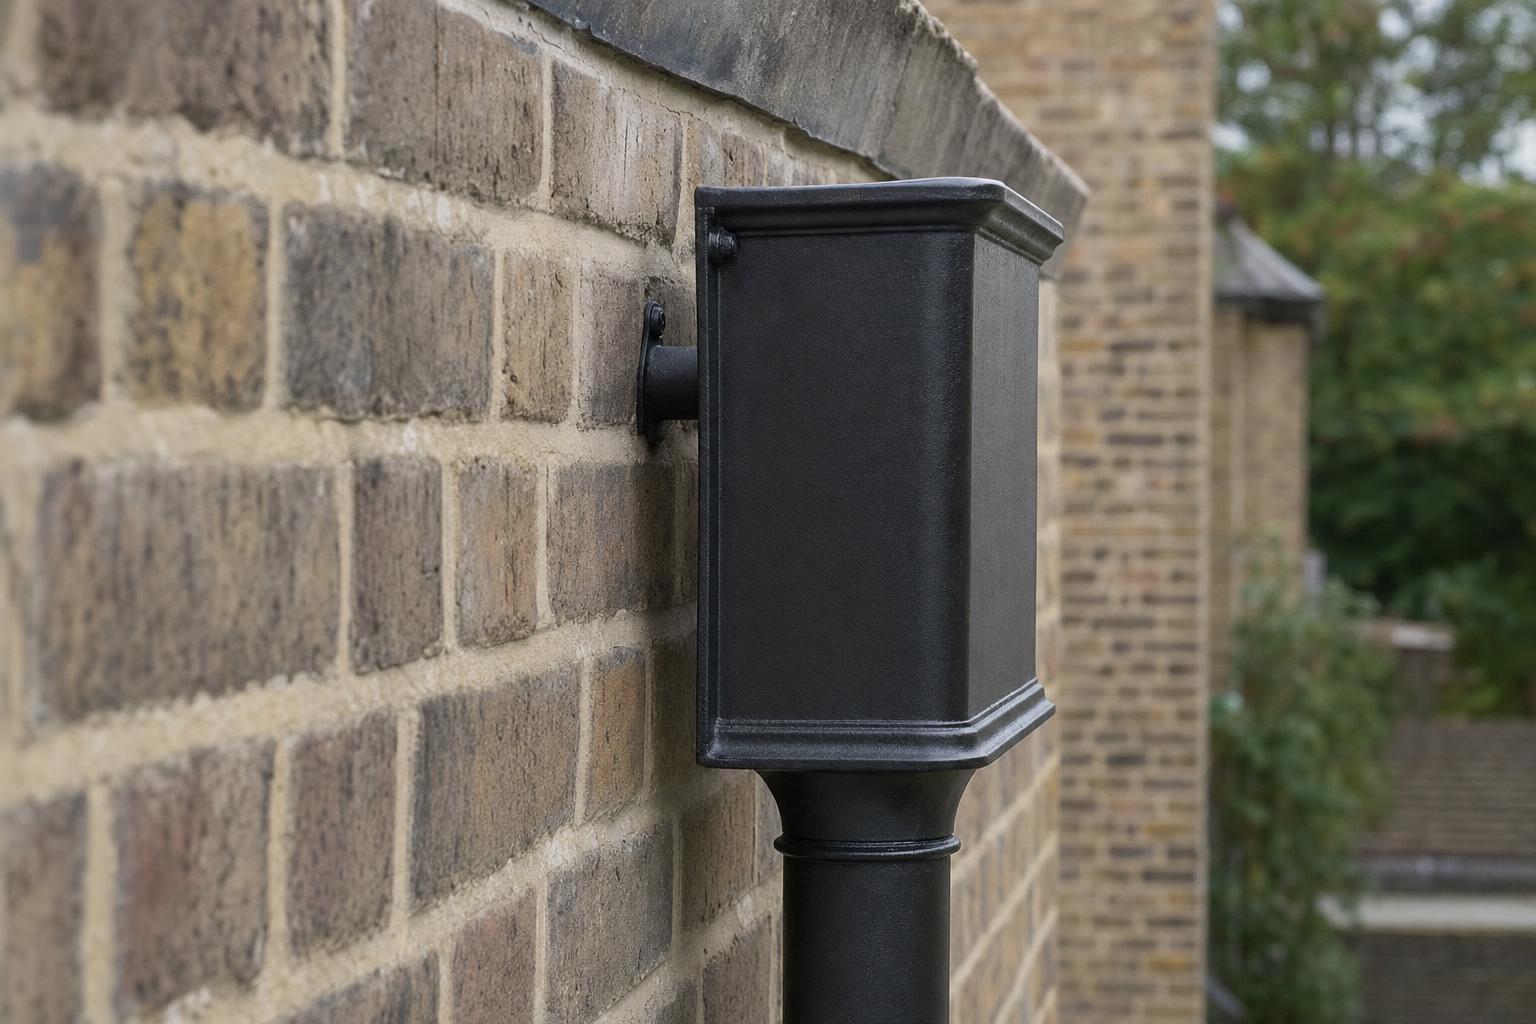
A rear-inlet hopper is priced as the standard head plus a fabrication cost for the modification, which we quote with each enquiry because it depends on the type and size of the outlet pipe being taken into the back. Standard stock hoppers are normally despatched within 5–7 working days of order; the modification adds to that, and we confirm the programme with the quotation rather than promising a date in advance. A linseed oil paint finish adds further time, which we build into that programme. Where no standard pattern suits and an entirely new head has to be made, a bespoke or copy-cast hopper typically takes 12–14 weeks from pattern approval.
With a rear inlet, a blocked downpipe fills the hopper until the water reaches the top rim — and because the inlet is below the rim, the water backs up the outlet pipe into the roof before the hopper overflows. Every rear-inlet detail therefore needs a separate emergency overflow through the parapet.
This is the single most important difference between a rear inlet and a traditional chute. With a chute discharging into an open head, the outlet sits above the hopper; if the downpipe blocks, the head fills and spills over its front edge, and the roof keeps draining. The spill is untidy but harmless, and it is the warning that tells the owner something needs clearing.
With a rear inlet, the overflow level is the hopper rim, which on our indicative arrangement is around 75 mm above the top of the incoming pipe. Until the water reaches that level, it has nowhere to go but back up the outlet and into the gutter behind the parapet. On a lead box gutter or a membrane flat roof, water standing even a short way above its intended level can find its way over an upstand, under a flashing or through a weak lap, and into the building.
The answer is not to avoid the rear inlet but to design for this behaviour:
Start from the outlet: measure its height below the coping and the clear wall below it, then choose the simplest detail that fits. Where a chute and an open-top head will fit, use them; reach for a rear inlet only when the height genuinely is not there or the outlet is a horizontal spigot that cannot discharge downwards.
| Situation on site | Recommended detail | Notes |
|---|---|---|
| Historic outlet with a lead chute, two or more courses below the coping | Lead chute into an open-top hopper | Retain or reinstate the traditional detail; usually what the conservation officer expects |
| Outlet high enough, but a string course or opening close beneath | Shallow or side-outlet hopper (e.g. Stanton No.543) | Check capacity against the roof area |
| Outlet within a course or two of the coping | Rear-inlet hopper | Separate emergency overflow essential |
| Modern through-wall spigot projecting horizontally | Rear-inlet hopper, or a spigot turned down into an open head where height allows | Check the spigot material for galvanic isolation |
| Prominent, highly listed elevation with lost original detail | Reinstate chute and head; consider copy-casting the original pattern | Discuss with the conservation officer before specifying |
| Uncertain outlet position, damaged masonry or difficult access | Commission a site survey before specifying | Protects the project from an ill-fitting head |
Where the outlet itself is in the wrong place — set too high because the roof has been raised by insulation, for example — the better course may be to reconsider the roof detail rather than to adapt the hopper. That is a conversation for the roofing designer and the conservation officer, and we are glad to contribute to it.
Like-for-like repair of cast iron rainwater goods rarely needs consent on its own, but changing the detail at a parapet outlet on a listed building — introducing a rear-inlet hopper, moving an outlet or replacing a chute — may well do. Check with the local planning authority’s conservation officer before ordering.
The relevant heritage body depends on where the building is: Historic England in England, Cadw in Wales, Historic Environment Scotland in Scotland, and the Historic Environment Division in Northern Ireland. In each case the starting point is the same: retain historic fabric where it can be repaired, reinstate traditional details where they have been lost, and justify any change by reference to the building’s significance. Our listed building questions guide covers the wider consent position for gutters and pipes.
On a principal elevation, the traditional chute and open head will normally be the expected solution, and a rear inlet would need a clear justification — typically that the outlet cannot be set lower without disturbing historic fabric. On rear elevations, later extensions and new flat roofs behind historic parapets, a rear-inlet head in cast iron is often a sympathetic way of tidying an awkward modern outlet, and is a considerable improvement on an exposed spigot discharging onto the wall.
Whatever the detail, the material should remain cast iron to BS 460:2002+A2:2007, finished appropriately for the building. For listed and conservation work we recommend linseed oil paint, which is breathable, flexible and straightforward to maintain without stripping.
To quote a rear-inlet hopper, or to confirm that a standard head will work below an outlet, we need the outlet’s size and material, its position on the wall, and the space around it. Photographs with a tape measure in shot are usually enough to begin.
Where the outlet position is uncertain, the masonry is damaged, or access is difficult, we recommend a site survey before specification. It is a chargeable service, but it removes the guesswork from a junction where a few centimetres decide whether the head fits.
A rear-inlet hopper is installed in a particular order: cut and prepare the outlet pipe, offer the head up onto the pipe, fix it plumb on its lugs and spacers, connect the downpipe, and only then seal the joint. Maintenance is the same as for any parapet roof, with particular attention to keeping the downpipe and overflow clear.
| Task | Frequency | What to look for |
|---|---|---|
| Clear parapet gutter, cesspool and outlet | Twice a year and after leaf fall | Silt, leaves, moss, nesting material |
| Check hopper and downpipe flow | Twice a year | Standing water in the head; slow drainage |
| Check the rear joint | Annually | Staining on the wall below or behind the head; failed mastic |
| Check the emergency overflow | Annually | Blockage; staining showing it has operated |
| Inspect paint finish | Annually | Breaks in the coating, particularly inside the head and at the socket |
| Maintenance repaint | When inspection shows wear; frequency depends on exposure | Clean, spot-prime bare metal and recoat — linseed oil paint is maintained, not stripped |
Most problems at parapet outlets come from fitting the head before thinking about the outlet, and from treating the overflow as optional. These are the faults we see most often:
These scenarios are representative of the parapet situations we are asked about. They illustrate the decision process and are not presented as Tuscan Foundry projects.
Georgian terrace, Bath — Grade II
A representative scheme on a Bath terrace, where parapet gutters behind the balustrade discharge through lead chutes into moulded hopper heads on the rear elevation. Several heads had cracked and the chutes had sagged, letting water run down the ashlar. The appropriate repair is to redress the chutes and replace the heads like-for-like, keeping the open-top arrangement the terrace was built with. No change of detail is needed, and the elevation reads as it always has.
New Town tenement, Edinburgh — Category B
Rear elevations in Edinburgh’s New Town often carry outlets close beneath a deep cornice, with tall stair windows immediately below. Here the outlet sits high enough for a head beneath it but the band is shallow, so a wide, shallow side-outlet pattern suits better than a deep ornamental head. The downpipe is taken off to the side to clear the window architrave, avoiding a stack of offsets across the stonework.
Rear extension to a Victorian house, London — conservation area
A flat-roofed brick rear extension of the kind found across London, drained by a through-wall outlet that emerges only two courses below the coping. There is no room for a head beneath the spigot. A moulded rectangular hopper with a rear inlet lets the head sit level with the outlet and conceals the pipe, with a separate overflow spout through the parapet so that a blocked downpipe cannot back water up across the roof membrane.
Regency villa, Cheltenham — Grade II
A stuccoed villa where re-roofing raised the parapet gutter, and an early proposal suggested a rear-inlet head to suit the higher outlet. On the principal elevation the traditional chute and open head are the expected detail, and the better solution is to rework the cesspool so the outlet returns to its historic level. It illustrates the order of thinking: correct the outlet where possible, and adapt the hopper only where the outlet cannot sensibly move.
Georgian town hall, mid Wales — Grade II
A civic building with a large lead-lined box gutter behind its parapet and a single outlet on each return. Repeated internal leaks traced back to blocked downpipes with no emergency overflow. The appropriate remedy is to provide overflow spouts through the parapet, enlarge the heads and downpipes to suit the roof area, and keep the traditional chutes. Cadw guidance on retaining historic fabric applies throughout.
Yes. A standard moulded rectangular hopper can be modified in the workshop to take a socket in its back face, so the outlet pipe enters directly from the wall. It is used where the outlet is too close to the coping for a hopper to sit beneath it. The top rim is left intact and at least 25 mm of solid metal is kept around the opening.
Far enough that the moulded top band is not touched and at least 25 mm of solid metal remains around the opening. On a typical 355 mm moulded head with a 50 mm pipe, that puts the centreline around 100 mm below the top. The exact position is set from site measurements.
Not if it is done correctly. Strength depends on keeping the top rim intact, keeping at least 25 mm of metal around the opening, and forming the socket in the workshop. An opening cut too close to the rim, or made carelessly on site, can weaken the casting and lead to cracking.
We do not recommend it. Cast iron is brittle under impact and point load, site drilling risks hairline cracks, and it leaves bare metal inside the head where water collects. A workshop modification keeps the metal thickness correct and the head primed and finished as one piece.
The traditional detail is a lead chute dressed through the parapet from a lead-lined cesspool, discharging into the open top of a cast iron hopper head fixed below the outlet. It is easy to inspect, needs no sealed joint, and overflows harmlessly if the downpipe blocks. Wherever there is the height for it, it remains the first choice.
You may. Like-for-like repair of cast iron rainwater goods rarely needs consent, but changing the detail — introducing a rear inlet, moving an outlet or replacing a chute — can affect the character of the building. Speak to the local planning authority’s conservation officer before ordering.
The hopper fills until water reaches its top rim, and because the inlet is below the rim, water backs up the outlet into the gutter or roof before it overflows. That is why every rear-inlet detail needs a separate emergency overflow through the parapet and a regular maintenance regime.
Yes. Gutters and roofs behind parapets should have an emergency overflow so that a blockage cannot flood the building, and BS EN 12056-3 expects them to be protected in this way. It is essential with a rear-inlet hopper and strongly advisable with any parapet roof.
If the outlet is high enough for a head below it but the band is narrow, a shallow or side-outlet pattern such as our Stanton No.543 is often the answer. If the outlet is so close to the coping that no head can sit beneath it, a rear-inlet hopper is usually the right choice.
Yes, and it is one of the most common uses. Through-wall outlets from membrane roofs usually leave the wall as a short horizontal spigot, often low in the parapet. A rear-inlet cast iron head takes that spigot directly, conceals it and sends the water down a properly fixed downpipe. Isolate dissimilar metals at the joint.
It is priced as the standard hopper plus a fabrication cost for the modification. We quote the modification with each enquiry because it depends on the type and size of the outlet pipe. Send us the outlet details and photographs and we will price it with the head and downpipe.
Standard stock hoppers are normally despatched within 5–7 working days of order, and the modification adds to that; we confirm the programme with your quotation. If an entirely new pattern is needed, a bespoke or copy-cast head typically takes 12–14 weeks from pattern approval.
With a non-setting mastic or a suitable gasket, not a rigid mortar or hard-setting compound. A flexible joint allows for movement, keeps water from tracking behind the head, and lets the hopper be removed for maintenance or repainting.
The outlet pipe’s diameter and material, its height below the coping, its offset from the nearest corner or feature, the clear wall below it, the roof area it serves, whether there is an emergency overflow, and the building’s listed status. Photographs with a tape measure in shot are usually enough to start.
The parapet outlet is a small junction with a large influence on how a building weathers. Start from the outlet, not the hopper. Where there is height below it, the traditional lead chute discharging into an open-top cast iron head remains the best detail: simple, visible, and forgiving when something blocks. Where the band is narrow, a shallow or side-outlet pattern often fits. Where the outlet sits so close to the coping that no head can go beneath it, a rear-inlet hopper lets the head sit level with the outlet — provided the rim is left intact, at least 25 mm of metal surrounds the opening, the joint is flexible, and a separate emergency overflow protects the roof.
We supply the full range of cast iron hopper heads for heritage buildings, and we make rear-inlet hopper heads to order as a workshop modification of our moulded rectangular patterns, priced on top of the standard head according to the outlet. Send us photographs and the outlet measurements and we will confirm the right detail, or call us on 0333 987 4452. You can also reach the team through our contact page.