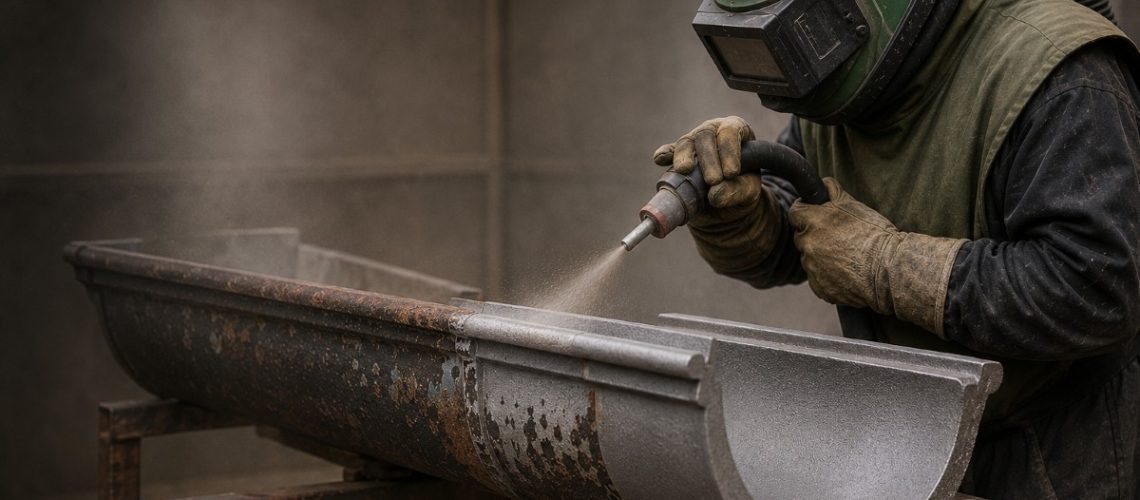
Every cast iron gutter, downpipe and hopper head on a historic or listed building will eventually need its paint removed, at least in part, and its surface prepared for redecoration. The safest method of cleaning and preparing cast iron rainwater goods depends on the condition of the existing paint and metal, not on which method happens to be fastest or cheapest to specify. Manual hand-tools, alkaline chemical stripping and cryogenic dry ice blasting all preserve the historic casting, while grit blasting and high-impact power tools frequently do not — and the difference is not cosmetic. It is the difference between a component lasting a further seventy-five years and one failing within a decade.
This article is written for architects, conservation officers, surveyors, heritage contractors, church wardens and listed building owners specifying or commissioning this work. Mistakes are common: contractors used to modern steel or aluminium often default to grit blasting or needle scaling because it is fast, without appreciating how differently grey cast iron behaves under abrasive load. We set out the pathology of cast iron degradation, compare the preparation methods available, provide a decision framework for repair versus replacement, and explain how to specify a coating system — including traditional linseed oil paint — that will not need aggressive stripping again for a decade or more.
Cast iron rainwater goods rely on an intact outer “casting skin” and a sound paint system for their durability, and damaging either during cleaning can cut decades from a component’s service life.
Architectural cast iron rainwater goods — eaves gutters, rainwater heads, downpipes and their brackets — were a major technological advance in eighteenth- and nineteenth-century construction, replacing high-maintenance lead linings with a rigid, durable, mass-producible material. On listed buildings they are rarely just functional; decorative hopper heads, moulded ogee profiles and heraldic motifs contribute directly to a building’s architectural interest, which is why cast iron as a building material remains the default specification for Grade I and Grade II* structures.
Most historic rainwater goods are grey cast iron, containing 2.0–4.0 per cent carbon and significant silicon. During sand-casting, molten iron cools slowly, allowing excess carbon to precipitate as microscopic graphite flakes within a ferrite or pearlite matrix. This gives grey iron exceptional compressive strength — typically 90,000 to 140,000 psi — but also renders it inherently brittle, with low tensile strength and negligible ductility. Cast iron cannot withstand significant bending, impact or thermal shock without risking brittle fracture, which is the single most important fact to keep in mind when choosing any cleaning method.
A critical feature of sand-cast iron is the “casting skin”, or fire skin: a hard, dense layer formed by the chilled reaction between molten iron and the silica-rich mould. This layer acts as a natural barrier against moisture and oxygen, giving cast iron corrosion resistance superior to mild steel. It does not regenerate once removed — which is why the preparation method chosen has such a lasting effect on future corrosion rate. When rainwater goods fail or block, concentrated discharge saturates masonry; in historic buildings without damp-proof courses this triggers dry rot, wet rot in joinery, plaster breakdown and masonry spalling. Maintaining the rainwater system is therefore fundamental to conserving the whole building, not a peripheral task.
Cast iron rainwater goods degrade through three distinct mechanisms — localised pitting, graphitic corrosion, and moisture trapped beneath multiple paint layers — and each requires a different approach to inspection and cleaning.
When bare cast iron meets moisture and oxygen, an electrochemical reaction forms rust; urban or coastal pollutants accelerate it considerably. Corrosion rarely appears uniformly. Instead, localised pitting establishes itself at micro-defects in the paint film, inside unsealed joints, or along unpainted rear faces fixed tight against damp stone. Pitting penetrates deep into the wall thickness while the surrounding surface remains relatively unaffected, eventually perforating the wall and creating micro-fractures that propagate under thermal stress.
Graphitic corrosion is a particularly dangerous mechanism specific to grey cast iron, occurring where components face long-term moisture or contact with wet soils and masonry. Because graphite is noble relative to iron, a microscopic galvanic cell forms between the two, and as iron leaches away it leaves a porous, brittle network of graphite and corrosion products. The critical problem is that an affected component retains its original shape and appearance — it looks sound but its strength has been substantially compromised, and can shatter under light impact. Visual surveys cannot detect this; ultrasonic wall-thickness testing is the only reliable method where graphitisation is suspected.
Over decades, historic rainwater goods accumulate multiple paint layers — lead primers, linseed oil topcoats, bitumen and modern alkyds — that together act as a structural bandage. While the outer layers may look continuous, water vapour often penetrates hairline cracks and becomes trapped between metal and primer. Within this enclosed environment, pitting and graphitisation proceed undetected, concealing metal loss and structural cracking. When paint is finally stripped, contractors frequently uncover voids, perforated sections and detached lugs — turning a simple redecoration into an unplanned structural project, and one reason a careful on-site survey before specification is worth the cost many times over.
Selecting an inappropriate preparation method can cause permanent, irreversible damage:
Five methods are commonly used on historic cast iron, sitting on a spectrum from entirely appropriate for in-situ conservation work through to effectively prohibited under heritage guidance.
Hand scrapers, stiff wire brushes and abrasive paper shear away loose, flaking paint and powdery rust. It is highly targeted for spot repairs where the underlying paint remains sound, though it cannot efficiently strip multi-layer historic paint or reach deep rust in pitted crevices. By hand it does not generate sufficient force to breach the casting skin, so structural fracture risk is minimal — which is why manual preparation is favoured by Historic England, SPAB and Historic Environment Scotland for routine in-situ maintenance.
Alkaline paste systems — typically sodium or calcium hydroxide, such as Peelaway 1 — are applied by trowel and covered with a laminated blanket to prolong dwell time. The paste saponifies fatty-acid chains in historic paint binders, converting them into a soluble slurry that lifts away with the blanket. It excels at removing thick, multi-layered build-up — up to thirty layers in one application — from ornate hoppers without abrading detail, and leaves the casting skin fully intact. The principal risk is chemical entrapment in pitting and joints: residual alkalinity causes premature paint failure and flash rust, so every surface must be washed down and neutralised to a stable pH of 6.5–7.5 before drying and priming.
Dry ice blasting propels solid carbon dioxide pellets at high velocity. Cleaning relies on kinetic impact, thermal shock that fractures the paint layer through mismatched contraction, and sublimation, as pellets expand 700–800 times in volume on impact, forcing fractured paint away from the substrate. It is highly effective on brittle paint, carbon crusts and soot, though less so on soft elastic modern coatings. With a hardness comparable to chalk, the process is entirely non-abrasive and cannot pit or strip the casting skin. Contact time is measured in milliseconds and cast iron’s mass provides a substantial thermal sink, so structural micro-fracturing risk is negligible at correct pressures (2.0–5.0 bar). It produces no secondary waste and no water or chemicals — increasingly the preferred method for sensitive ornate detail.
Abrasive blasting propels garnet, slag or glass beads via compressed air, scouring the surface through direct erosion. It offers unrivalled speed in stripping to bare “white metal” standard (ISO 8501-1 Sa 2.5/Sa 3), but aggressive media strips the casting skin and exposes the porous matrix beneath. At excessive pressure (above 5.0 bar) or with coarse media, it will shatter thin-walled iron and distort profile geometry. In-situ abrasive blasting is generally prohibited by heritage authorities due to containment failure, masonry abrasion and dust, and is permitted, if at all, only off-site at low pressures (1.5–3.0 bar) with fine, non-metallic media.
Pneumatic needle scalers, power wire wheels and grinding discs operate through rapid mechanical impact or friction. They present extreme conservation risk: needle scalers introduce micro-fracturing along graphite boundaries and can shatter brittle castings, while wire wheels burnish active rust into a shiny layer that prevents primer adhesion. Heritage conservation standards strictly prohibit these tools on architectural cast iron, and we do not specify their use on any historic component.
| Method | Casting Skin Preservation | Risk of Metal Damage | In-Situ Applicability | Heritage Acceptance |
|---|---|---|---|---|
| Manual hand tools | Excellent — no impact abrasion | Minimal; safe for fragile assemblies | Excellent — ideal for spot works | Universally accepted |
| Chemical paste stripping | Complete — non-abrasive | Low if neutralised; chemical risk if not | High — requires containment sheets | Highly accepted; neutralisation mandatory |
| Cryogenic CO₂ (dry ice) blasting | Complete — zero erosion | Negligible at correct pressure | Excellent — zero secondary waste | Preferred modern method for detail |
| Off-site abrasive blasting (fine media) | Poor unless pressure controlled | High risk if pressure > 3 bar | Prohibited in situ; workshop only | Strictly controlled, off-site only |
| High-impact tools (needle scalers) | Zero — scours and pits surface | Severe — micro-fracture and lug loss | Moderate — vibration hazard | Generally unacceptable |
Full paint stripping should never be the default: sound, well-bonded paint should be cleaned and lightly abraded to key it for new topcoats, and total removal is justified only when specific failure thresholds are met.
If existing paint is tightly adhered, free of underlying blistering and shows no sign of trapped moisture, full stripping is unnecessary and can be harmful, exposing sound metal to preparation risks it did not need. In such cases, clean with detergent to remove grease and biological growth, rinse, and lightly abrade with fine sandpaper for a mechanical key. Total stripping is necessary only where:
Before specifying any method, we recommend an on-site survey carried out during heavy rainfall where possible, to pinpoint overflows and joint leaks. Inspect hidden rear surfaces with a mirror or borescope, carry out localised scrape tests to check adhesion, and commission ultrasonic wall-thickness testing wherever graphitic decay is suspected. A survey undertaken before specification routinely prevents the kind of structural discovery that derails a project’s budget and programme midway through works.
Retention and repair should always be the first objective; replacement is justified only where structural integrity is irreversibly compromised, typically once wall thickness loss from pitting or graphitisation exceeds around 40 per cent.
Conservation principles set out by Historic England, the Society for the Protection of Ancient Buildings (SPAB) and Historic Environment Scotland mandate maximum retention of historic fabric — a position we set out further in our note on repair and restoration of cast iron guttering. Complete replacement is a last resort.
Cold stitching is an engineer-approved mechanical repair for fractured or split cast iron requiring no applied heat. Transverse slots are drilled across the crack line and high-tensile alloy keys are cold-driven in and peened to lock mechanically, with threaded studs installed along the fracture for a pressure-tight seal. With no thermal input, it eliminates the risk of secondary cracking in brittle grey iron, retains 100 per cent of the original casting fabric, and restores up to 90 per cent of original tensile strength — a repair we consider first for cracked hoppers that might otherwise be condemned unnecessarily.
Welding cast iron is difficult due to its high carbon content: uncontrolled heating and rapid cooling precipitate hard, brittle white iron along the weld zone, causing immediate cracking. Welding must therefore be carried out off-site, with components stripped, cleaned, pre-heated uniformly in a furnace, welded with high-nickel filler rods, then cooled slowly over 24 to 48 hours in insulating media to relieve thermal stress. On-site arc welding or brazing without pre-heating reliably leads to stress cracking and structural failure.
Failed gutter joints are the most common source of localised leakage. Corroded bolts should be cut with a fine hacksaw rather than sheared, to avoid snapping the socket, and hardened old putty removed with hand scrapers. Joint faces are wire-brushed, primed with zinc-rich primer, and re-bedded using a flexible low-modulus silicone sealant or polyurethane mastic, then re-bolted with stainless steel (Grade 316) fixings and isolation washers, tightened evenly to avoid point-loading. The choice of fixing matters as much as the sealant here — see our note on galvanic corrosion and the correct fixings for cast iron rainwater systems.
When a component is missing, shattered, or shows over 40 per cent wall thickness loss, replacement becomes necessary. Replacements must match the original like-for-like in material, dimensions, profile, hopper volume and decorative detailing — off-the-shelf profiles should never substitute for a bespoke Victorian or Edwardian moulding. This is the purpose of copy casting: an original section is used to create a timber pattern, adjusted for shrinkage, from which a bespoke sand-cast replacement is poured. Increasingly frequent high-intensity rainfall has overwhelmed some historic systems; Historic England guidance is that capacity should rise without compromising heritage significance, preferably through additional downpipe outlets, resetting gutter falls, or optimising below-ground discharge — not oversized modern profiles, which alter eaves proportions and typically require Listed Building Consent.
Rainwater System Materials Compared for Heritage Use
| Property | Grey Cast Iron | Heavy Cast Aluminium | Extruded Aluminium | PVCu |
|---|---|---|---|---|
| Design life (painted) | 75–100+ years | 40–50 years | 20–30 years | 10–15 years |
| Heritage compliance | Full; mandatory on Grade I / listed | Conditional; needs consent | Generally unacceptable | Unacceptable; enforcement risk |
| Thermal expansion | Very low | Moderate | Moderate | Extremely high |
| Repairability | High — stitching, welding, pattern matching | Moderate — specialist welding | Low — thin sections | None — landfilled |
We set out the fuller case for retaining cast iron over modern alternatives in cast iron versus steel alternatives and why cheap is very rarely best.
Bare metal exposed during cleaning must be primed within four hours to prevent flash rusting, and long-term performance then depends on a compatible, multi-layered coating applied to every face before the component goes back up.
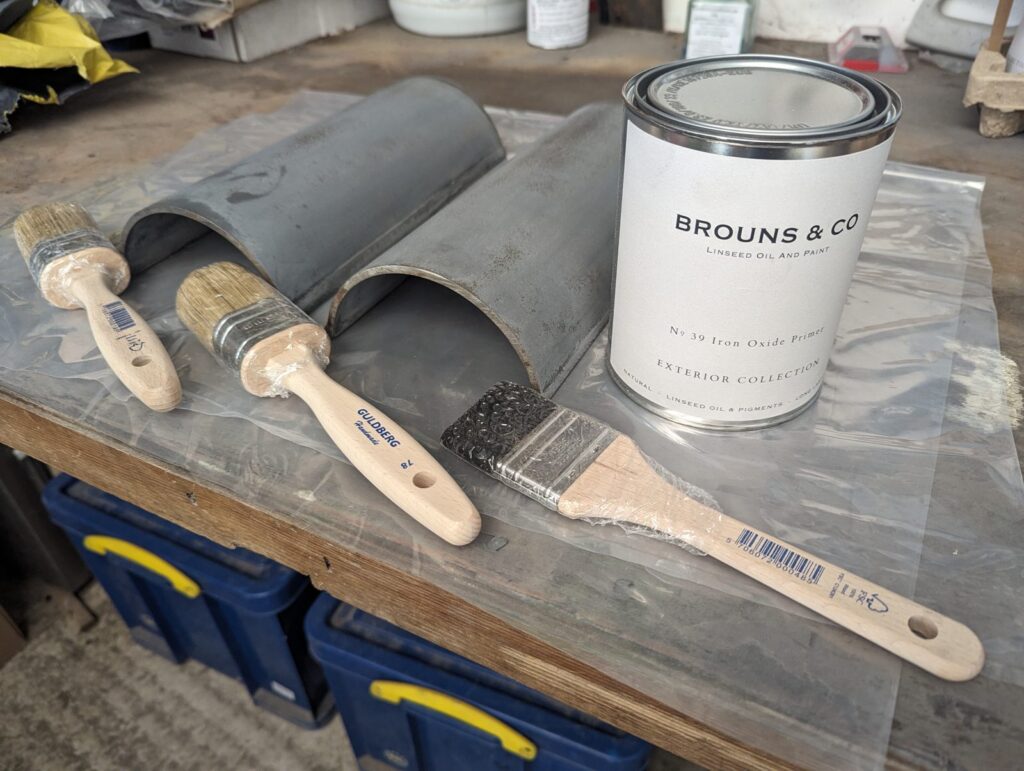
A modern heritage specification typically uses three stages: a zinc-rich or epoxy phosphate primer providing cathodic, sacrificial protection so the zinc corrodes preferentially if scratched; an intermediate coat formulated with Micaceous Iron Oxide, whose plate-like platelets align parallel to the surface to block moisture and resist UV degradation; and two topcoats in a historically appropriate colour — typically black, dark bronze or heritage dark green — ensuring full coverage over sharp casting edges.
For the highest level of conservation work, we favour traditional linseed oil paint as the historically accurate finish. Its small molecules penetrate deep into micro-porous cast iron to anchor the coating securely, curing into a flexible, breathable film that moves with the metal without cracking. It needs thin, hand-brushed application and 24–48 hours’ drying time per coat, but unlike synthetic systems, which typically need aggressive stripping when they fail, a linseed system can be refreshed with a light coat every five to seven years, with a full repaint needed only every eight to twelve. Our own approach to hand-painting cast iron guttering and pipes follows this specification as standard.
All new or restored components must be fully painted — primer, intermediate coat and first topcoat — on every face before installation. Painting the rear face of a downpipe once it is fixed against masonry is nearly impossible, leaving the most vulnerable area unprotected. Downpipes should sit on holderbats or spacer collars holding the rear face at least 25mm to 35mm clear of the masonry, allowing air circulation, future maintenance access, and ensuring minor joint leaks run clear of the wall.
The most costly mistakes on cast iron rainwater projects are almost always avoidable, and nearly all come down to treating cast iron like a modern, ductile material rather than the brittle, high-carbon casting it actually is.
The following examples illustrate how these principles apply in practice across a range of building types and geographies.
The Old Rectory, Norfolk (Grade II* Listed)During a routine repaint of this Georgian rectory’s cast iron gutters, a scrape test revealed sound paint but an unusual dullness to the profile. Ultrasonic wall-thickness testing confirmed graphitic corrosion in two gutter lengths, with the remainder unaffected. The two compromised sections were replaced using pattern-matched copy casting; the sound lengths were cleaned by hand and recoated, avoiding unnecessary and costly full replacement.
New Town Tenement, Edinburgh (Category A Listed)A hairline crack appeared in an ornate hopper head bearing the building’s original heraldic motif after a hard winter. Rather than casting a replacement, the contractor specified cold stitching using Metalock keys — a repair that retained the full original casting, including its decorative detail, and restored the majority of its original mechanical strength without applying heat.
Parish Church, Gloucestershire (Grade I Listed)Ornate gutter brackets bearing carved detail and a maker’s mark had previously been damaged elsewhere in the county by an overly aggressive off-site grit blast. For this church, cryogenic dry ice blasting was specified instead, removing decades of paint build-up in situ without abrading the fine detail or the casting skin beneath it — a direct illustration of why method selection matters as much as intent.
Georgian Terrace, Bath (Grade II Listed)More than thirty layers of historic paint had accumulated on decorative ogee gutter brackets over two centuries. An alkaline chemical paste system was applied under a laminated blanket to lift the full paint history in a single application, followed by a strict wash-down and pH-neutralisation protocol before re-priming, preserving every line of the original moulded profile.
Nonconformist Chapel, Powys, Wales (Grade II Listed)A shattered hopper head, its wall thickness reduced by graphitisation to well under 60 per cent of its original section, could not be safely repaired. Following Listed Building Consent, a like-for-like sand-cast replacement was produced from a pattern taken off the surviving casting, matching profile, volume and decorative detail exactly.
Cleaning and preparing cast iron rainwater goods is not a single procedure but a decision made component by component: retain and lightly clean where paint is sound, strip only where failure thresholds are genuinely met, and choose a non-abrasive method — manual hand-tools, alkaline chemical paste, or cryogenic dry ice blasting — wherever possible to preserve the casting skin that has protected these components for well over a century. Grit blasting, needle scalers and power wire wheels should be avoided on historic cast iron in almost every circumstance, and where damage genuinely exceeds repair, replacement should always be like-for-like, cast from an original pattern, rather than a change of material or profile.
As a specialist supplier of cast iron gutters, downpipes, hoppers and fittings for the conservation sector since 1893, we support this whole process directly: we carry out chargeable on-site surveys to establish condition before specification, we undertake copy casting from an original section or drawing where like-for-like replacement is the only responsible option, and we finish new and restored ironwork in traditional linseed oil paint as standard. Bespoke and copy-cast items typically carry an 8–10 week lead time, which we flag at enquiry stage so projects can plan around it. Whether your project involves a single hopper head or a full gutter run on a Grade I church, we would encourage a survey before specification, and are always glad to discuss the right approach for a particular building. Browse our product catalogue or contact us directly to talk through a project.
No, not generally, and not in situ. Direct grit or shot blasting strips the protective casting skin, risks distorting original profile detail, and is considered high-risk to fragile, brittle iron unless carried out off-site in a workshop at carefully controlled low pressures (1.5–3.0 bar) using fine, non-metallic media. In-situ abrasive blasting is normally prohibited by heritage authorities because of containment failure, masonry abrasion and dust hazards.
If the existing paint is tightly bonded, free of blistering and shows no sign of moisture trapped beneath it, cleaning and light abrasion for a key is sufficient — full stripping is unnecessary and can expose sound metal to preparation risks it did not need. Total stripping is justified only where paint is widely blistered or flaking, underlying pitting or graphitic decay is suspected, or fine detail is obscured by excessive build-up.
Graphitic corrosion is a selective leaching of the iron matrix that leaves behind a porous graphite network while the component retains its original shape and appearance. It cannot be identified by eye and requires ultrasonic wall-thickness testing to detect, because an affected casting can shatter under light impact despite looking sound.
Alkaline chemical paste stripping and cryogenic dry ice blasting are both non-abrasive and preserve fine decorative detail and maker’s marks, making them the preferred methods for ornate hoppers, brackets and moulded profiles. Chemical paste requires strict pH neutralisation afterwards; dry ice blasting requires no rinsing at all.
Routine, like-for-like cleaning and repainting of existing cast iron rainwater goods does not normally require Listed Building Consent, but replacement, a change of profile, or works that expose or alter underlying historic fabric often will. We recommend confirming the position with the local conservation officer before specifying any works beyond straightforward redecoration.
In many cases, yes. Cold stitching (the Metalock process) repairs fractures without heat, retaining the full original casting and restoring up to around 90 per cent of its original strength, while more extensive damage can be addressed by specialist off-site welding using furnace pre-heating and slow, controlled cooling.
Under a traditional linseed oil system, a light refreshing coat every five to seven years and a full repaint every eight to twelve years is typical; systems finished in modern synthetic paints generally need more frequent, more disruptive attention because the coating tends to crack and peel rather than wear gradually.